What is a Break Policy?
A Break Policy is a set of rules you where you can outline how long a break should be depending on the shift length and whether or not it will be paid.
You can have as many different policies as you like and assign them to any contract. This allows you to have different policies for different types of employment and also allows you to adjust policies over time (whilst maintaining your older policies for staff employed at that time).
Why do we use Break Policies?
Break policies help ensure that staff members get the breaks they are legally entitled to under government guidelines. Under the Break Policies page you will see that you have automatically been set up with a system default break policy. This is created by StaffSavvy and includes the basic breaks you are required to have by UK government guidelines (depending on the length of a shift).
The system also allows you to create multiple policies in the case that your company has different break policies or has specific policies depending on the type of contract.
Building a Policy
To access the break policy management, go to System > Absence and Breaks > Break Policies.
You will see the existing default policy built by the system that you can edit along with options to add a new policy. The default break policy can be edited to fit your needs and should reflect your standard break policy.
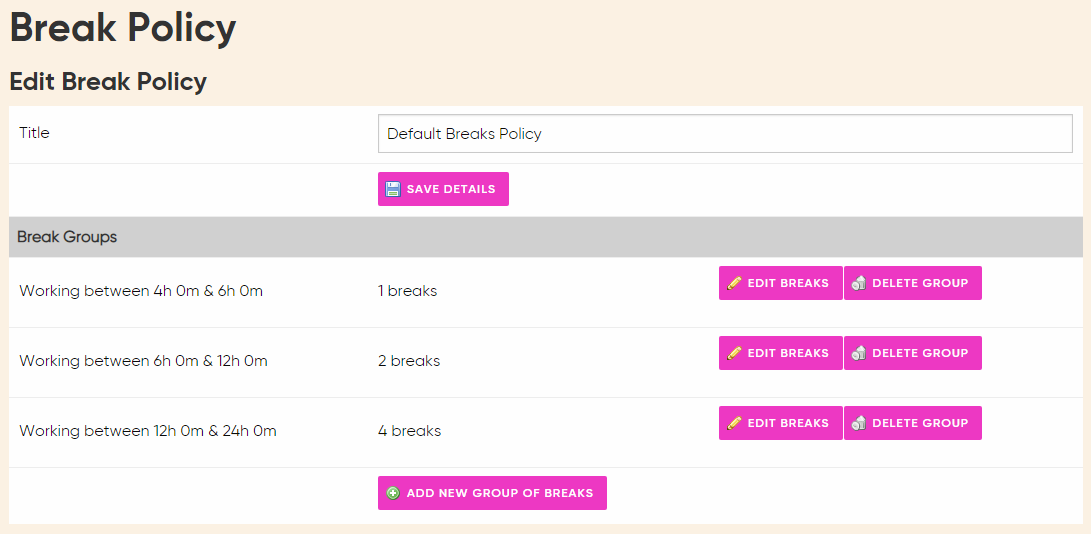
Once you have completed your default break policy you might want to add more break policies and to assign them to different contracts. This means staff can be entitled to different breaks depending on their contract (and with multiple contracts they can be using different break policies for different skills).
To do this first click Create Policy. The first thing you need to do is set a title, and then you can create a group. Break policies are made up of groups with each group designed to cover the length of a shift.
Under each group you can set the hours worked for that group (i.e. the shift length), the number of breaks allowed and the length of the break.
So, if you want a break policy for any shifts over 6 hours, create a group with the shift lengths set to 6 hours and 1 minute (so over 6 hours) and choose a maximum length. Then you can add the breaks you would need for the break - for a shorter shift like this it might only be a single break. But for a longer shift it might include multiple breaks. The next section will explain how to create a break and go through those settings.
Note: to prevent confusion, ensure your break groups do not overlap.
Creating a Break
Once you have a group set up, you can add breaks to that group. Each break has a duration and a note stating whether it’s paid or not. There are several configuration options here that allow you to make breaks optional, exclude them from automatic creation, and have them not checked when adding a remote time entry.
In addition to this, you can add consequences for missing a break. If a break is missed you can add a fixed pay amount or add an additional time entry.
Additionally, if a break is late you can adjust your hourly rate. What this means is that, if enabled, this setting will automate compensation for the staff member if their scheduled break is delayed. It functions as a payroll adjustment to ensure the employee is paid for the inconvenience of a late break.
It will activate when a break is taken after the scheduled time, or continues until the end of the time entry if no break is taken. The system will add a specific amount of extra hours to their pay (You can the set the amount here in settings).
The actual hours worked remain unchanged in your system records. This ensures that while the employee receives correct compensation, the original time sheet will remain accurate for auditing or scheduling purposes.
Once you are happy with your break you can save and then save your break group as is or add another break to the group.
Attaching your Break Policy to a contract
Once you have set up your break policy go to Pay > Contracts > Manage Contracts to attach it to a contract. Click to edit the contract you want to attach the Policy to. Then under the Breaks, Rests & Limits tab, scroll to the bottom to Breaks you can select your break policy that you want to apply for that contract.
Once attached every staff member with this contract will be expected to receive breaks that follow this policy. The system will automatically apply any configuration options that have been set up for that contract.
If a staff member has multiple contracts, the system uses Skills to identify the correct rules. Since each contract is linked to a specific skill, the system uses that skill to ensure the employee always gets the correct break rules for the specific Skill they are performing during their shift.
Comments
0 comments
Please sign in to leave a comment.